快速开始指南
快速开始
商业版项目组成由以上三个子项目以及数据库文件

1.后端IceWK-ment项目
打开项目目录选择sql文件夹
选择对应你mysql版本的数据库文件

使用数据库可视化工具navicat或者sqlyog等软件创建数据库

然后导入数据库sql文件。
在后端yml中配置数据库连接
yml文件在IceCMS-main目录下:

按照yml配置数据库名称端口和账号密码
redis配置项在这里,默认不用改

运行后端api前务必启动redis和mysql。

mvn clean和install即可打成jar包,可运行jar就在IceCMS-main目录的targer文件夹目录下。 如果脱离IDEA,需要单独运行jar,执行
java -jar main.jar即可
启动后端项目之前,最重要的事情是一定要先启动redis服务,再启动后端服务。否则后端无法启动,因为后端启动会初始化各种配置项至redis缓存中。
2.移动端uniapp项目
uniapp目录在主项目目录下的IceWk-uniApp目录下
 找到utils/api.js配置api接口地址
 修改小程序appid(如果你要用小程序版本就一定要改这里!!)


按上图所示即可运行小程序,如果你是第一次运行uniapp项目到微信开发者工具,
需要去配置一下微信开发者工具的安全端口,不然无法唤起微信开发者工具(具体百度看博客示例参考 https://blog.csdn.net/lyx1838102537/article/details/122491185 )。 uniapp端运行到小程序以后不要着急微信登录,这时会报错“openid解析失败”,因为你的后台管理系统还需要配置小程序appid和密钥。不然无法登录。
3.后台管理端IceWk-vues项目

这是开发环境配置端口的地方

这是生产环境接口地址配置地方
初次使用请使用npm install安装依赖 安装依赖有的用户可能会报错,报错了按报错日志要求安装其他需要的本机依赖。
或尝试
npm install --legacy-peer-deps --registry=https://registry.npm.taobao.org
依赖安装后运行npm run dev即可启动项目
后台地址:localhost:8080/admin
后台访问不了请配置好伪静态
location / {
  try_files $uri $uri/ /index.html;
}
后台账号:admin admin123
Refine works on any environment that can run React (incl. Vite, Next.js, Remix, and CRA(Legacy) etc.)
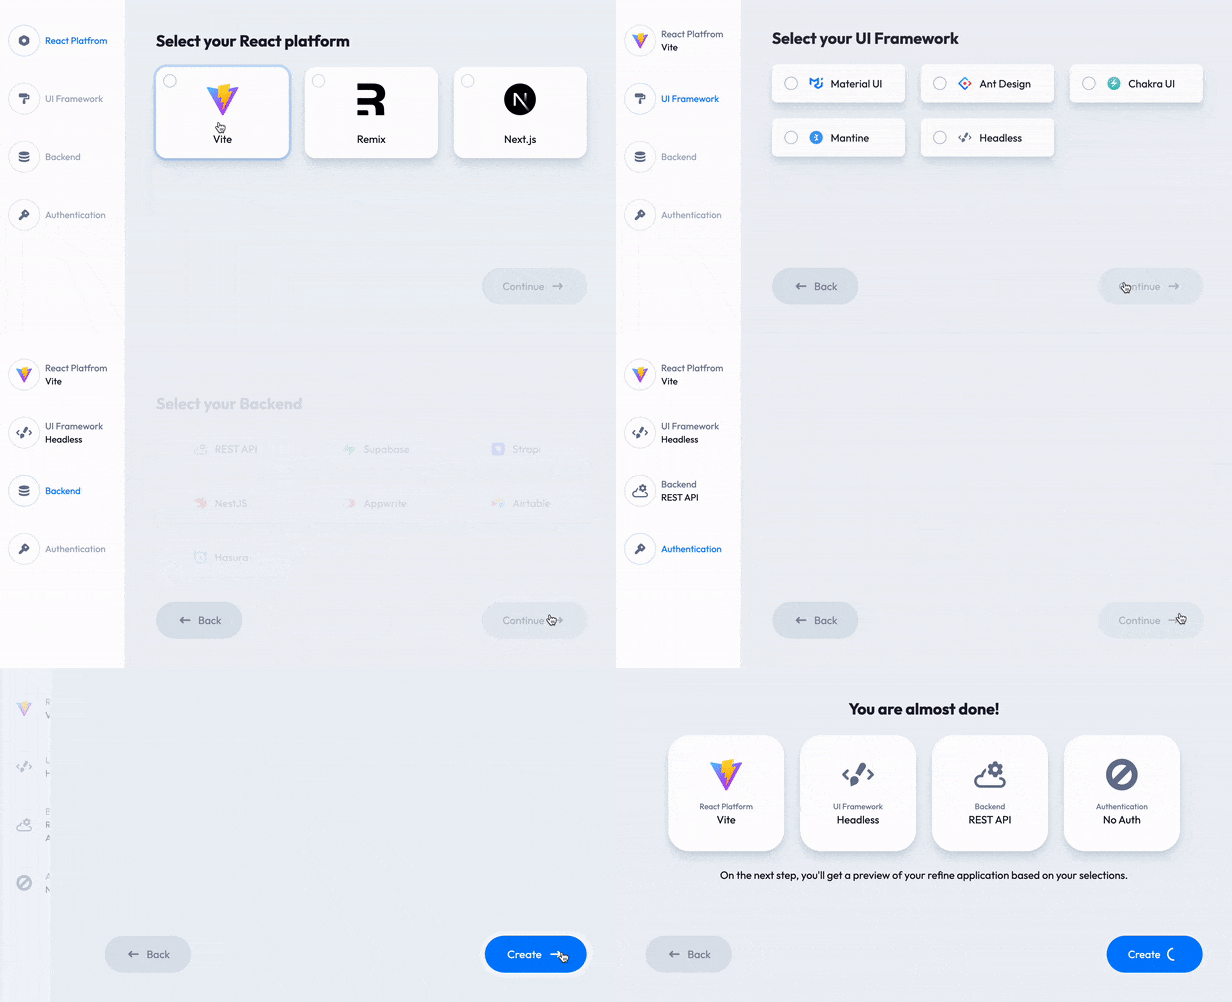
Although you could take the time to manually set up your environment and install the Refine packages afterwards, the optimal way to get started with Refine is using the Browser-based Scaffolder and CLI-based Scaffolder.
Choose one of the methods below to bootstrap a Refine app:
- With Browser-based
- With CLI-based
This is an efficient tool that allows you to create Refine app seamlessly in your browser.
You can choose the libraries and frameworks you want to work with, and the tool will generate a boilerplate code for you.
- Navigate to scaffolder and select libraries and frameworks you want to work with by using interactive UI.
- Download the generated project by clicking on the "Build & Download" button.

- Next, navigate to the project folder, install the dependencies, and then start your project.
> npm install

> npm run dev
create refine-app provides built-in templates for Vite, Next.js, Remix, and CRA(Legacy) environments, so you can bootstrap a Refine project in just a couple of minutes. It also offers a wide range of options that you can easily configure for your UI framework, i18n, router, Auth. and data provider preferences.
- To get started, run the following command. The CLI wizard will assist you for the rest of the setup process:
npm create refine-app@latest
- Once the setup is complete, navigate to the project folder and start your application with:
npm run dev
In case you select Yes for the Do you want to add example pages? option while using the CLI wizard, the Refine will add sample CRUD pages utilizing [Refine Inferencer] and fill the resources property.
It is highly recommended to add example pages as it provides a clearer understanding of how Refine works and lets you test out the CRUD operation functionalities.
Now, you can access the Refine application at http://localhost:3000.
You will see the output as a table populated with blog_posts and category data with filtering, sorting, and pagination features.
